One Stop Away From Crazy Town

Besides kids and cakes, what else do you need?

Desserts for the Deserving July 13, 2012

Filed under: Cupcakes — Jen @ 1:34 am
Tags: ,

Did you know I love to bake? Did you know I love to bake for other people, friends and strangers included? So when I saw a blog post entitled “Calling All Bakers!” over at i am baker I knew I had to volunteer. This is part of Amanda’s Desserts for the Deserving movement, and her sole purpose in doing this is to “bring people joy.”


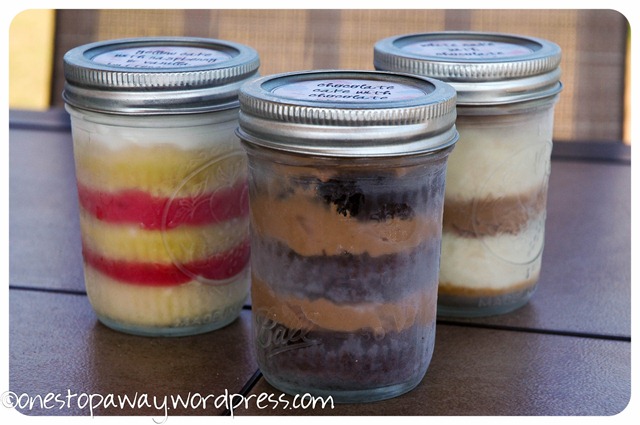
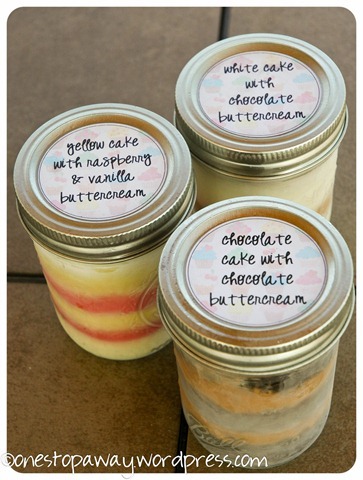
I was matched up with one of the many Deserving recipients, and that’s when I suddenly think “What was I thinking? Am in in over my head?” and “What in the world can I make and ship all the way to Washington?” Cookies aren’t my forte, and I can’t ship a cake so what about cupcakes? But again…how am I going to ship cupcakes across the country? That’s when I had my a-ha moment: cupcakes in a jar!


DSC_0178


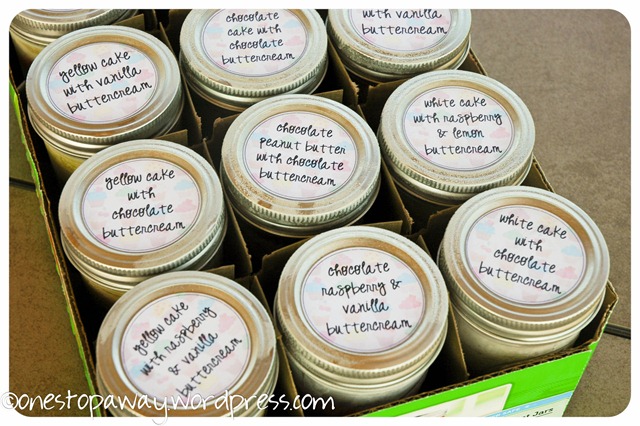
Ok…a-ha moment achieved. Now specifically *what* am I going to put into these jars? I decided to keep it simple and stick to the basics: 12 jars with 4 each of yellow, white and chocolate cake. For the filling and icing? I had Oreo buttercream, lemon buttercream, peppermint buttercream, peanut butter buttercream, vanilla and chocolate buttercreams and raspberry filling to choose from, and that’s when things really got fun. I mixed and matched all of the above for a great assortment of flavors. Chocolate and peanut butter? Check. White and raspberry? Check. I almost didn’t want to give these away! Yum-O!


DSC_0179


Creating these sweet treats was the fun part, now on to “How in the world am I now going to ship this across the country?” With 100°+ temperatures and an extreme heat advisory I was at a loss. Brainstorming with my husband, we figured #1 they need to be frozen first. That will be the first defense in surviving the trip. Then throw in a couple of ice packs, packing peanuts, bubble wrap and the USPS Express Mail option and we have success! I hope! I mailed the box yesterday morning, and it’s scheduled to be delivered Saturday.


DSC_0180


I’m excited, nervous, proud and happy pretty much all rolled into one. So to Kim or Ann (the BFF who nominated her) if you end up reading this please know how honored I am to have been matched with you. I had so much fun doing this for you, and I hope you enjoy it as much as I did.


To read more Deserving stories: Nominate Someone You Love

To follow along with other bakers and their recipients: Deserving for the Deserving Facebook Page

To see other bakers’ blog posts: Desserts for the Deserving Pinterest Board


I can’t wait to do it again next year!

Jen


School’s Out for Summer May 31, 2012

Filed under: Bucket List,Family,Summer — Jen @ 6:31 pm
Tags: , ,

Or The One Where I Admit My Addiction to Pinterest.


I’m stepping out of the kitchen for a moment to show you what is a current project in our house this summer. Every year I have the best of intentions for when summer break comes. You’re bored? No problem! Super Mom has an amazing selection of fun and educational activities to entertain you, and while you’re at it I have a selection of worksheets for you to work on so you don’t lose all that knowledge you spent the last year acquiring. I’ve stocked up on craft supplies. I have piles and piles of school books and worksheets all ready for the kids to work on. I can plan and make lists with the best of them. Where I always run into a snag is follow through. What’s this gotten me? Shelves and shelves of various paints, pipe cleaners, fabric markers, stickers and glue sticks and piles and piles of school papers that, when left to their own devices, seem to miraculously procreate.


This year my summer goal is to simply have fun, and I don’t want to hear the dreaded words: “Mom, I’m bored.” Through the magic of Pinterest I discovered so many wonderful ideas for summer activities. What’s not said in that sentence is that I can spend literally hours pouring over pins, reading blogs that take me to other blogs, etc. I’ve pinned so many recipes and crafts and activities (for me and for the kids) that I decided it’s time to stop ogling other people doing these things and start doing them myself. And I’m not talking about anything fancy. Just simple, everyday things that I wouldn’t have thought of on my own because my brain just doesn’t work that way anymore. Plus I get to go through and actually start using some of our craft supplies.


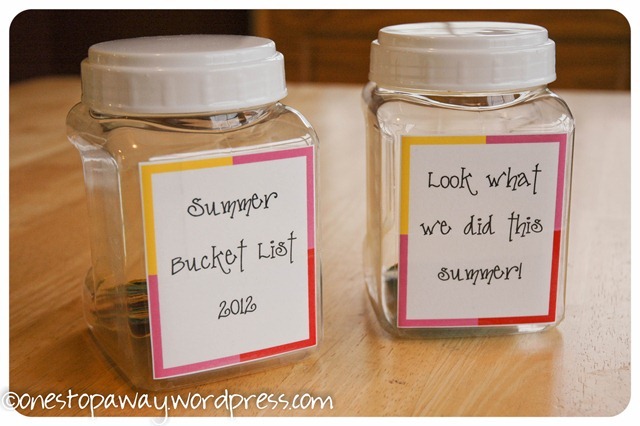
I know it’s not new by any means, but I found the idea of a Summer Bucket List a few weeks ago. What a fantastic idea! The perfectionist in me wanted to go all out with this, but the realist in my decided to keep it simple. I picked up a couple of plastic containers at the dollar store along with a few craft supplies (Like I really needed more, but I just can’t help myself!).


Bucket List


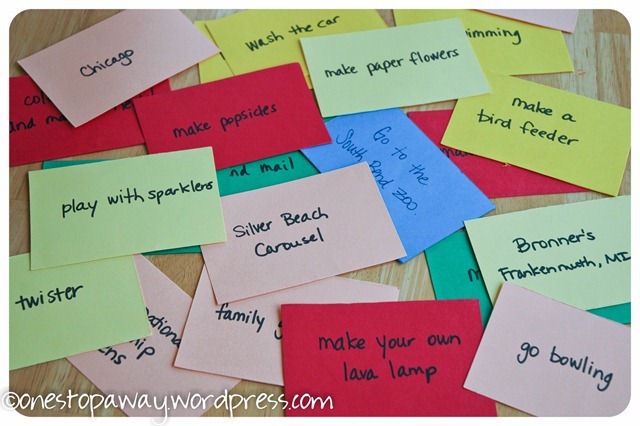
The kids and I sat down and came up with activities to do, places to go and recipes to make. I cut each piece of card stock (that I already had) into 8 pieces, and using a Sharpie I wrote each bucket list item on a piece of card stock. I created a couple of labels in Publisher, printed them onto card stock and used packing tape to stick them to the containers. Voila! Our very own Summer Bucket List.


Bucket List2


The kids take turns drawing a card the the day or evening before. This gives me a chance to make plans or buy anything that will need to be bought. There are a couple items that will require at least a few days notice, but I’ll figure that out as we come to it. Then once the activity is finished we put that card into our finished bucket – the one labeled “Look what we did this summer!” I’m taking pictures every step of the way, and though we’re only on day 2 we’ve had a blast – me included.


Interested in making your own bucket list? Here’s what we have in ours to give you some ideas:


make a bird feeder
make a smoothie
go swimming
toy swap with a friend
make paper flowers
wash the car
visit Aunt Jess
color pasta and make a necklace
make a collage
Chicago
Potawatomi Zoo
write a letter and mail it
make popsicles
play with sparklers
sidewalk chalk art
lawn twister
go bowling
Bronner’s
make cookies
Silver Beach Carousel
make your own lava lamp
make slime
go berry picking
family game night
International Friendship Gardens
scavenger hunt
Washington Park Zoo
go to the library
play in the sprinklers
backyard campout
make giant bubbles
go on a picnic
sponge tag
read for 10 mins (or more)
Funflatables
glow stick bowling
go to the beach
make ice cream
stay up late and watch for shooting stars
water balloon piñatas
play a board game
Pajama Day!
Bellaboo’s
make banana bites
build a fort
make an edible necklace
family room campout
go fishing with Daddy
make cloud dough
tie dye
face painting
frozen fun
backyard water bed
Fort Wayne Zoo


Want even more? Check out my Summer board on Pinterest. There are more ideas than you could ever hope for or have enough days to accomplish.


Happy Summer!


Summer Bucket List Challenge


A Red Velvet Do-Over March 17, 2012

Filed under: Cake,Recipes — Jen @ 7:09 pm
Tags: , , ,

I know it’s the end of the day and probably too late to make these if you wanted to. But who knows? Maybe you have a St. Patrick’s party to go to tomorrow. Or you could just pin these for next year. Winking smile

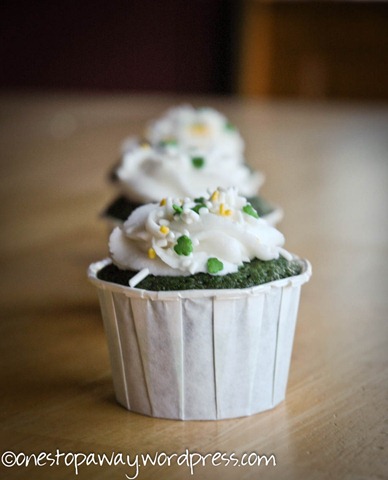
Because of my amazing time management skills I ended up throwing these together at the last minute. (Thank goodness I had frosting in the freezer!) Do a search for Green Velvet Cupcakes, and you get a massive amount of results. The top picks were names I’d heard of but never followed or tried any of their recipes. As much as I would love to try some Hi-Hat/Dipped cupcakes, I simply didn’t have the time and decided to stick with a name I know and love: Bakerella.

Green Velvet Trio

As I’m putting these together I realize I don’t have enough cupcake liners. No problem! I’ve had a couple packages of Wilton nut cups in my stash for a while just waiting for an opportunity to be used. They were easy to use and made handling and transporting a breeze.

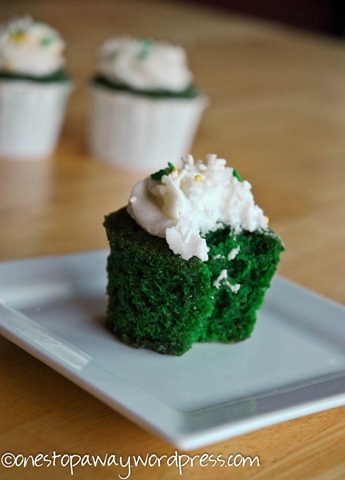
I thought they were delicious. My daughter thought they were delicious, but she might be biased. My husband (only slightly less biased) said, “They go good with coffee.” So there you go…pin them for later and enjoy!

Green Velvet Cupcakes

from Bakerella

  • 2-1/2 C. flour
  • 2 C. sugar
  • 1 Tbs. cocoa
  • 1 tsp. salt
  • 1 tsp. baking soda
  • 2 eggs
  • 1 C. oil
  • 1 C. “buttermilk” (mine needed to be dairy free, so check here for how I make buttermilk)
  • 1 Tbs. vinegar
  • 1 tsp. vanilla
  • a glob of green food coloring (yes, glob is the technical term)

  1. Preheat oven to 350 degrees. Prepare your muffin tins.
  2. Lightly whisk eggs in a medium bowl. Add remaining liquid ingredients and whisk together until blended. Set aside.
  3. Place all dry ingredients in your mixing bowl and stir together really good. (I used my KitchenAid’s whisk attachment.)
  4. Add wet ingredients to the dry ingredients and mix on medium-high for about a minute or until completely combined.
  5. Pour into prepared muffin cups. I had enough batter to make exactly 24 cupcakes.
  6. Bake for about 30 minutes or until a toothpick comes out clean. (Bakerella’s original recipe is for cakes, so I started checking my cupcakes at 20 minutes. They were done in about 23.)

A cream cheese frosting would pair nicely with this, and Bakerella has one on her post. Since I needed them dairy free I stuck with my standard buttercream and topped them off with some shamrock sprinkles.

Green Velvet Bite

Bake on!

Jen


Smooth March 14, 2012

Filed under: Cake,Recipes — Jen @ 12:00 pm
Tags: , , , ,

*Sigh* I’m so far behind in blogging, but I’ve still been baking! I’m knocking out my Someday List one by one! Smile


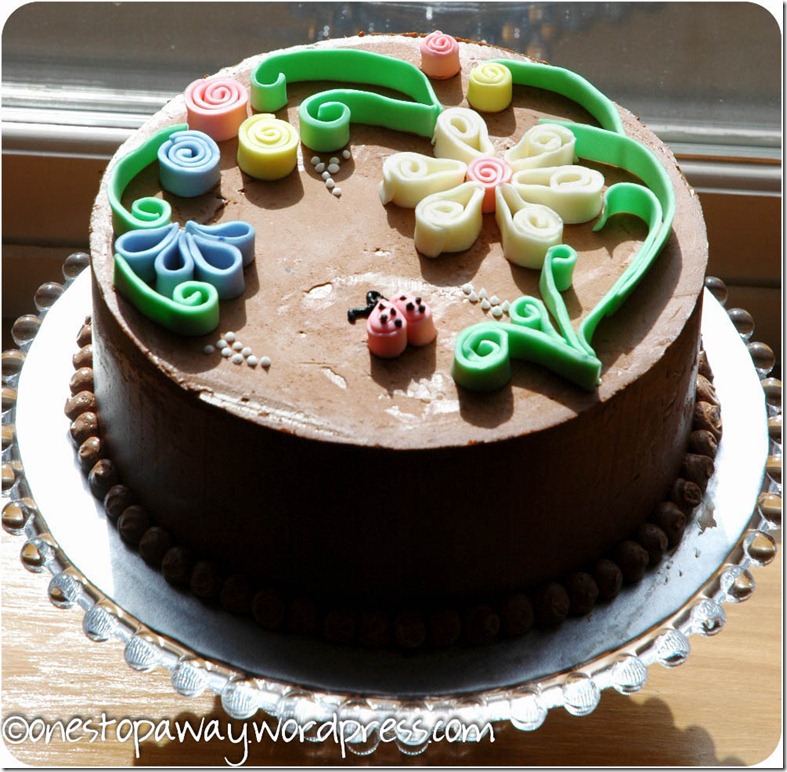
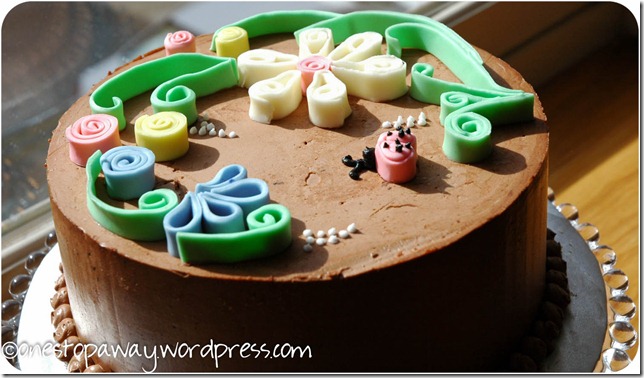
I’ve been doing a lot of chocolate cakes, and this cake continues the trend. What can I say? I do have other types of cake on my agenda, but this cake HAD to be chocolate. It was a birthday cake for my mom, and that’s just how we roll. Personally I’m of the opinion that if chocolate is one of your choices why in the world would you pick anything else? In my defense I have been trying different chocolate cake recipes.


Like I said, this was a birthday cake for my mom. I thought about doing a white cake, but who am I kidding. When I mentioned it to my mom there was a good five seconds of silence on the phone. LOL There’s one person in my immediate family who prefers white cake, but she’s just going to have to wait for HER birthday. My sister suggested a Nutella® filling et voila!


DSC_0164 (2)-2


A chocolate hazelnut truffle cake is born!

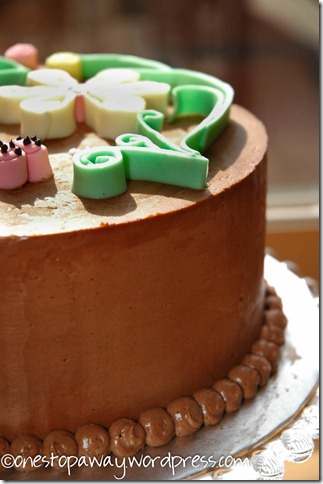
I chose to use a chocolate Swiss meringue buttercream. It truly is worth the effort. It’s much easier to spread and work with. Some people prefer the taste, as it’s not as sweet. Plus it’s much easier to smooth and get sharp corners.

DSC_0166-2

Disregard the over exposed flowers on top and check out that sharp corner and smooth sides!

I LOVE working with Swiss Meringue, but I’ve found that it’ all a matter of preference. You’ll be hard pressed to find any two bakers with the same recipe or technique. My first time working with it was for this cake, and I followed Whisk Kid’s recipe to a T with no problem. Then I found this recipe last fall, and I’m in love. Seriously.

Time consuming? Yes. Completely awesome and worth every second, every minute you put into it? Why yes, yes it is.

DSC_0162-2

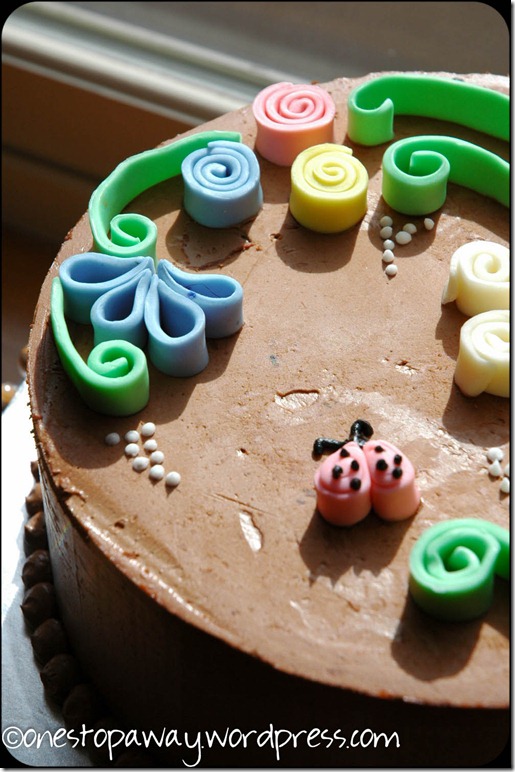
The technique I used to decorate the top is quilling. The design and technique I used can be found here at MyCakeSchool. I don’t know what I was expecting, but this was remarkably easy to do. Next time, though, I would let my strips of fondant sit out a bit to stiffen a bit before working with them. Mine were a bit soft to work with easily, and I had a hard time trying not to smoosh (yes, that’s the real technical term) my swirls together, but this technique leaves a lot of room for error. Check out the technique and give it a try! You won’t be disappointed.

Perfect All-American Chocolate Butter Cake

from The Cake Bible

  • 1/2 C + 3 Tbs. unsweetened cocoa
  • 1 liquid cup boiling water
  • 3 large eggs
  • 2-1/4 tsp. vanilla
  • 2-1/4 C. + 2 Tbs. sifted cake flour
  • 1-1/2 C. sugar
  • 1 Tbs. baking powder
  • 3/4 tsp. salt
  • 8 oz. unsalted butter, softened (not melted)
  1. Preheat oven to 350 degrees.
  2. In a medium bowl whisk together the cocoa and boiling water until smooth. Cool to room temperature. You may be will be tempted to lick your finger. Don’t. For the love that all that is holy, just don’t. Remember the scene in Big where Tom Hands tries caviar for the first time? That’s what I’m talking about. And you’re welcome.
  3. In another bowl lightly combine the eggs, 1/4 of the cocoa mixture and vanilla.
  4. In a large mixing bowl combine the remaining dry ingredients and mix on low speed for 30 seconds to blend. Add the butter and remaining cocoa mixture. Mix on low speed until the dry ingredients just until moistened. Increase to medium speed and beat for 1-1/2 minutes. Scrape down the sides of the bowl and gradually add the egg mixture. Do this in 3 batches, beating for 20 seconds after each addition. Scrape down the sides again.
  5. Put the batter into your prepared pans (I used two 8” pans) and smooth the surface with a spatula. Bake 25 to 35 minutes or until a toothpick or other cake tester comes out clean.

Chocolate Hazelnut Truffle Filling

adapted from Cake Central

  • 1 small container chocolate hazelnut spread
  • 2 (8 oz.) pkg. cream cheese, softened
  • 2 Tbs. extra dark cocoa powder
  1. Put cream cheese in a bowl and beat until smooth and fluffy.
  2. Scrape down sides and add the chocolate hazelnut spread and cream together.
  3. Add the cocoa powder and mix until combined.

This recipe makes a lot of filling, much more than was needed for this 8-inch cake. So unless you have something else to do with the filling I would try to halve it. You’ll still have some left over, but not nearly as much.

DSC_0168-2

Bake on!


Drool-licious February 23, 2012

Filed under: Cake,Recipes — Jen @ 5:41 pm
Tags: , , , ,

Okay, so we’ve created a new word. Just go with it.


I have great friends. Whether I’ve known them for 4 months or 4 years or more…they’re great. They let me whine and moan. They let me go crazy when I need to. They get me out of the house when I really don’t want to, but they know I need to. They really support me and let me be me. And usually they keep their snide comments to themselves or at least wait until I’m out of ear shot. Thanks guys!


One of the #1 things I LOVE about my friends? They let me bake them cakes, which lets me experiment on them. I don’t mean mad scientist experimenting, but food experimenting.


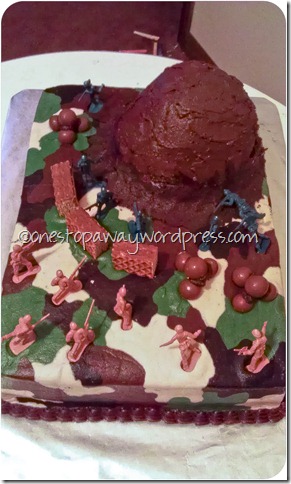
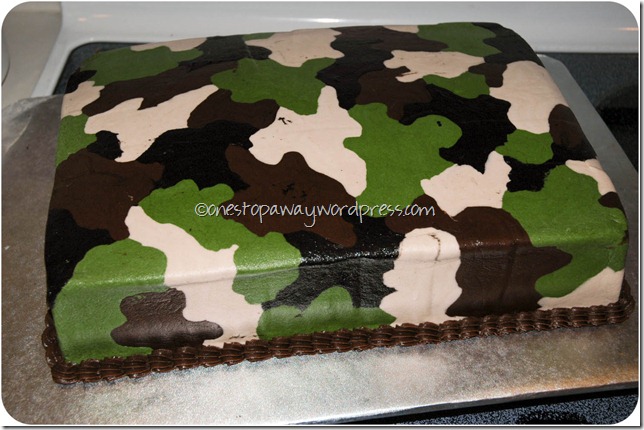
One of said friends asked me to do this birthday cake last week. Not only did I get to try out a new cake filling, but I finally had a chance to try out one of my “Someday” decorating techniques: camo buttercream.


On the menu is a triple chocolate cake with rocky road filling and decorated with a soldier theme. Rocky road is traditionally chocolate ice cream, nuts and marshmallows. I knew I wasn’t doing ice cream, so I switched that to a light whipped ganache. Then I folded in mini marshmallows and toasted chopped almonds. Yum-O! I couldn’t wait.

soldier cake 1-3


Triple Chocolate Cake

From Cake Central

  • 1 box Betty Crocker Triple Chocolate Fudge cake mix
  • 1 (3.9 oz.) box chocolate fudge instant pudding mix
  • 1 C. sour cream
  • 1/2 C. milk
  • 1/2 C. vegetable oil
  • 3 large eggs
  • 1-1/2 C. semisweet chocolate chips
  1. Preheat oven to 325 degrees. Prepare your cake pans. This cake was 9×13, so I sprayed my two cake pans with Wilton’s Bake Easy.
  2. Put cake mix, pudding mix, sour cream, water, oil and eggs into a large mixing bowl. I just dumped it all into the bowl of my Kitchenaid stand mixer. Blend on low for about 30 seconds. Stop the mixer and scrape down the sides of the bowl. Increase mixer to medium and beat for another 1-1/2 minutes — the batter will look like a thick pudding. Fold in the chocolate chips, making sure they are evenly distributed.
  3. Pour the batter into your prepared pans and spread smooth with a spatula.
  4. Bake in your preheated oven for 28 to 35 minutes or until a toothpick inserted into the center comes out clean. A 9×13 in my oven takes 40 minutes to cook through. Once the cake is done, remove from the oven and let it sit for about 10 minutes before turning out to cool completely.


Quick Light Whipped Ganache Filling

From The Cake Bible by Rose Levy Beranbaum

  • 4 oz. semisweet chocolate I used Ghirardelli Premium Semi-Sweet Baking Bar
  • 4 oz. dark chocolate I used Nestlé’s Dark Chocolate Baking Bar because that’s all that was at the store otherwise I would have gotten Ghirardelli.
  • 1 lb. heavy cream
  • 1/2 tsp. vanilla
  1. Refrigerate your mixing bowl and beaters.
  2. Using a double boiler melt the chocolate pieces with 2/3 cup of the cream. This will go quicker if you’ve broken the chocolate into pieces. Remove from heat before the chocolate is fully melted and finish melting by stirring constantly. Set aside until no longer warm.
  3. In the chilled bowl beat the cream until traces of beater mars just begin to show distinctly. Add the cooled chocolate mixture and beat just until soft peaks form when the beater is raised.


Rocky Road Filling

  • One recipe whipped ganache
  • Mini marshmallows
  • toasted, chopped almonds (or walnuts)
  1. Not really much of a recipe. I folded marshmallows and almonds into the ganache until I was happy there were enough of each to be evenly distributed. And no, I didn’t taste test it every step of the way so that I would be able to tell you that this is one fantastic filling. Nor did I stand in the kitchen at 7 a.m. with the leftovers and a spoon and eat any of it for breakfast. Nope. Didn’t happen.

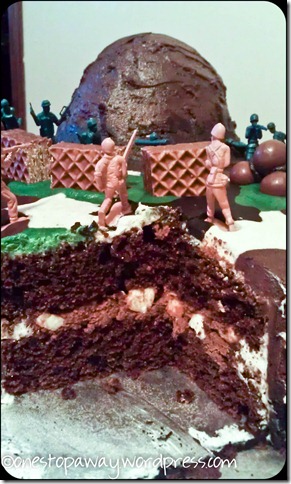
Here is a cross section of the assembled cake:

soldier cake inside 2-2

Look at those yummy marshmallow bits!

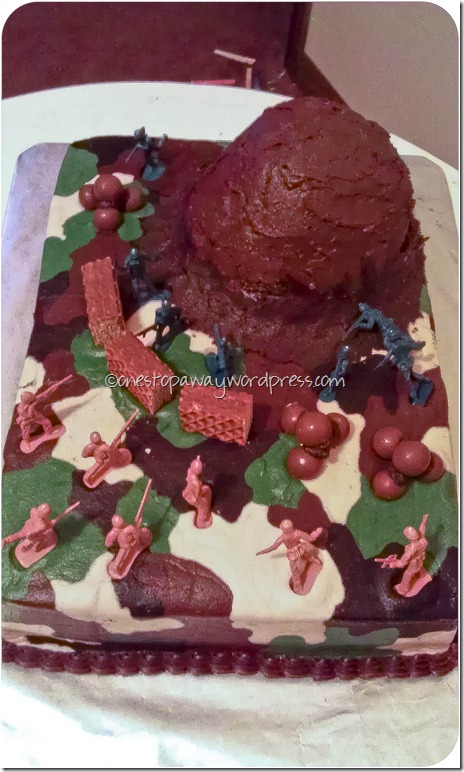
As far as decorating this bad boy, the camo effect is a lot easier than it looks. Time consuming? Yes. But I think it was worth it, and I’d be completely willing to do it again. There are so many wonderful camo cakes out there, but for a quick and easy tutorial check out Dillicious Cakes’ tutorial album on Facebook. It’s better than anything I could try to explain, so check it out!

Once your camo is done, you take this cake:

DSC_0138-2

Add a “dirt hill”, 1 Nutty Bar, 12 malt balls, a handful of Army men, and you get this:

soldier cake 1-3


Happy Birthday D! I’m honored to have been a part of your special day.


Week 7.0: Love February 16, 2012

Filed under: Cake,Recipes — Jen @ 10:50 am
Tags: , , , ,

Some of the things I love, in no particular order:

  • Spring
  • my Keurig (when it chooses to work)
  • my kids’ reactions when I tell them the cake I’m baking is for them
  • Samoas
  • my GPS (when it’s working)
  • Diet Dr. Pepper (and the husband that surprises me with it)
  • Penne with Shrimp and Tomato Cream Sauce
  • Comcast’s OnDemand
  • books
  • a clean kitchen sink (not that it happens a whole lot)
  • Toni Colette (I fondly remember the first time I saw Muriel’s Wedding.)
  • pinning and perusing ideas on Pinterest (with full understanding that I will never make 90% of what I pin)
  • musicals
  • Paul Oakenfold’s “Faster Kill Pussycat
  • the songs my youngest daughter “composes” (if you call her songs about me making her a pb&j as composing)
  • And don’t get me started on all things Gosling or Reynolds.


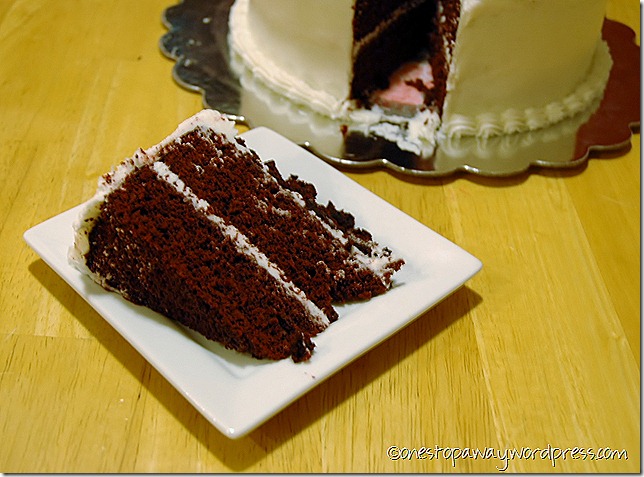
So with that said one of my favorites is #3 above. Well…anything having to do with my family really, but I spent part of the day Tuesday making my little valentines a red velvet valentine’s cake. I’ve been searching for a good red velvet recipe for quite some time, and I tried several that weren’t very good. Then I was reminded of Alton Brown. In the space of two days I found his recipe on Food Network, and my sister told me he had one I should try. Not sure why it takes me so long to go back to Alton, but I eventually get there. Mr. Brown, you are a food god.


DSC_0096


I did need to make it dairy free for my youngest, so I subbed margarine for the butter and made almond milk “buttermilk” with vinegar since I was out of lemon juice. I also used regular buttercream instead of the typical cream cheese frosting – again, to keep it dairy free.


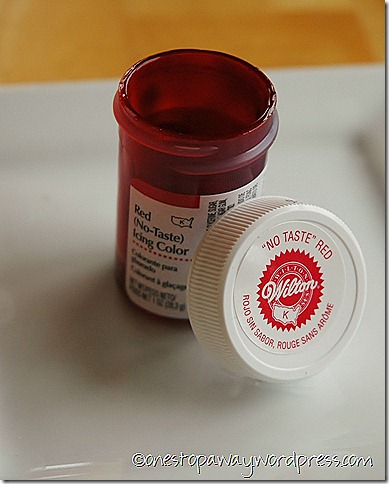
Keep in mind red velvet gets its color from red food dye. And not just a little bit of dye. I used an entire bottle of this:


DSC_0090


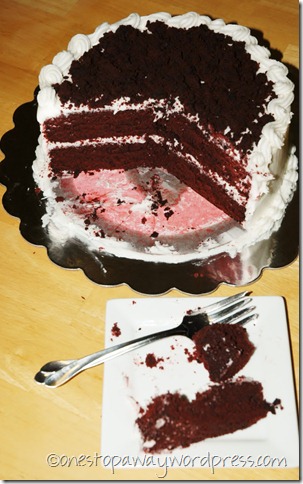
That is 1 oz. of Wilton’s No Taste Red. I used the whole thing. Even with all of this I still ended up with a not-so-red red velvet cake.


DSC_0105


Sorry for the horrible picture, but this gives you an idea of what I mean. I didn’t have regular cocoa powder. I used what I had (Hershey’s Dark), which could have affected the color. Food god I am not, so that’s just a theory.


Don’t like all the artificial color? One alternative is to hunt down the natural food colorings that are out there in the world. Probably fairly expensive, and I doubt you could get a vibrant color. There’s also a way to make the cake using beets, which I’ve tried. To put it simply: it’s a mess. And I would highly recommend you where gloves when handling the beets…go ahead and ask me how I know. Overall it’s a very time consuming process, so I don’t recommend it. But hey! If you have the time and the effort to spend then have at it.


Red Velvet Cake

adapted from Alton Brown’s recipe

  • 5-1/2 oz. flour
  • 4 oz. cake flour
  • 1/2 oz. natural cocoa
  • 1 tsp. baking soda
  • 1/2 tsp. kosher salt
  • 1 C. almond milk “buttermilk”, room temperature
  • 1 fluid ounce red liquid food coloring
  • 1 Tbs. white vinegar
  • 1 tsp. vanilla
  • 10-1/2 oz. dark brown sugar
  • 4 oz. margarine (we use Best Life buttery spread), room temperature
  • 2 whole eggs, room temperature
  • Buttercream, recipe follows
  1. Put 1 Tbs. vinegar to a measuring cup. Add enough milk alternative to equal 1 cup. Set aside.
  2. Preheat oven to 325 degrees. Alton’s recipe calls for 2 9-inch cake pans. I used 8-inch. Spray whatever size pans you’d like with non-stick cooking spray and line with parchment paper.
  3. Whisk together the flours, cocoa, baking soda and salt together in a bowl and set aside. Whisk the buttermilk, food coloring, vinegar and vanilla together in a small bowl and set aside.
  4. Combine the margarine and brown sugar in a bowl of a stand mixer and cream together on medium speed until lightened in color, approximately 2 minutes. Stop the mixer and scrape down sides of bowl. Return the mixer to medium speed and slowly add the eggs, beating until they are fully incorporated.
  5. With the mixer on low, add the flour mixture in 3 installments, alternating with the buttermilk mixture. You want to begin and end with the flour mixture. Between each addition stop the mixer and scrape down the sides of the bowl. Mix on low speed until smooth, about 30 to 45 seconds.
  6. Divide the batter evenly between your 2 cake pans and bake until the cake springs back when pressed, approx. 30 to 35 minutes.
  7. Cool in pans on a rack for 10 minutes. Remove from pans and let cool completely before icing, at least one hour.


Standard Buttercream

adapted from Wilton

  • 1 C. shortening
  • 1 tsp. vanilla
  • 8 tsp. milk alternative (you can also use water)
  • 1 lb. confectioners’ sugar
  • 1 Tbs. meringue powder
  • pinch of salt
  1. Cream together the shortening, vanilla and milk. Don’t be afraid to let the mixer run. You want this completely smooth and without any shortening lumps.
  2. Add your dry ingredients and mix on medium speed until everything has been incorporated. You’ll need to add more milk (or water) to get a spreadable consistency. Wilton recommends adding 1 tsp. water for each cup of icing. This recipe makes 2-1/2 C, so you’d need to add at least 2-1/2 tsp. water. Just add a little bit of liquid at a time until you’ve reached the consistency you’re comfortable with.


DSC_0117


True red or not, it was delicious! My valentines and I gave it 2 thumbs up. Red heart And speaking of valentines here’s my youngest. She’s my reason for being on this dairy free adventure. Love this girl.


DSC_0088


Enjoy!


Week 5: More Than Just a S’more Cake February 7, 2012

Disclaimer: There is a slight chance you may gain 5 lbs. just by reading about this cake, and for that I am sorry.

Well…not really because this cake was really, really good!

I was asked to make this cake for a Super Bowl party on Sunday, but put my own spin on it. My first thought when seeing the cake was, “What in the world?!” But this is part of the fun, right? So…challenge accepted.

I wish I’d take a picture of this beauty with a ruler next to it or something else to demonstrate just how big this cake turned out to be. All layers are 9-inch layers, and the cake ended up being about 6-1/4 inches once it was completely iced. This thing was HUGE, and it weighed a ton.

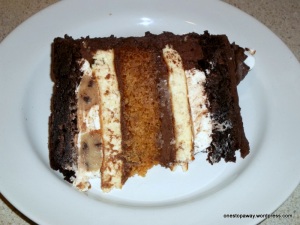
The true beauty is when you cut into it. You are presented with layers and layers of decadence, each one just as rich as the next. For your viewing pleasure:

From top to bottom, here’s what you need for this cake:

Brownie layer

Marshmallow buttercream with chocolate chip cookie dough pieces

Cheesecake

Chocolate buttercream

Graham cracker cake

Chocolate buttercream

Cheesecake

Marshmallow buttercream with chocolate chip cookie dough pieces

Brownie layer

Like I said…pure sinful decadence. And completely worth the calorie expenditure. Trust me.

Some things I learned while making this cake:

  1. Invest in springform pans – good ones. I already had one 9-inch pan, but to save time I bought another one. Just as the original poster suggested, this is what I used to bake the brownies and cheesecakes. I just split the batter between the two pans and voila! 2 perfect 9-inch rounds.
  2. Last year I made this vanilla buttercream from Savory Sweet Life and absolutely fell in love. This cake gave me a chance to try out her chocolate buttercream, and boy oh boy it didn’t disappoint.
  3. I absolutely loved the idea of including chocolate chip cookie dough instead of baking 9-inch cookies. With this cake I formed the cookie dough into balls and tried folding it into the marshmallow frosting to then spread on the cake. This worked better in theory than in actual execution. Next time though I would actually roll out the dough into a 9-inch disc and include it as its own layer.
  4. I used the original poster’s suggestion to try King Arthur Flour’s brownie recipe. It was just as good as she said it was; however next time I would use my own favorite brownie recipe. I don’t think it would be as dense. It was the brownie layers that gave me the most trouble when trying to cut through the cake.

Here are the recipes I used.

Brownies

INGREDIENTS

  • 1 C. (2 sticks) unsalted butter
  • 2-1/4 C. sugar
  • 4 large eggs
  • 1-1/4 C. cocoa
  • 1 tsp. salt
  • 1 tsp. baking powder
  • 1 tsp. instant coffee (The KAF recipe calls for espresso powder, which I don’t have.)
  • 1 Tbs. vanilla
  • 1-1/2 C. flour
  • 2 C. chocolate chips

DIRECTIONS

  1. Preheat the oven to 350 degrees. Lightly grease your pan, put a layer of wax paper or parchment paper down and then spray it again. Baker’s Joy or Wilton’s Bake Easy work great.
  2. In a saucepan melt the butter over low heat. Add the sugar and stir to combine. Continue to heat briefly, just until the mixture is hot, but not bubbling. It’ll become shiny looking as you stir it.
  3. While the sugar is heating again, crack the 4 eggs into a bowl and beat them with the cocoa, salt, baking powder, coffee powder and vanilla until smooth.
  4. Add the hot butter/sugar mixture, stirring until smooth. Then add the flour and chocolate chips, stirring until smooth.
  5. Bake the brownie for about 30 minutes, until a cake tester inserted into the center comes out clean. The brownies should feel set on the edges, and the center should look very moist but on uncooked. Remove them from the oven and cool on a rack.

Marshmallow Buttercream

From what I can tell most marshmallow frosting recipes are the same. What’s listed below is this recipe, but cut in half. It was Fan.Tas.Tic.

INGREDIENTS

  • 1/2 lb. (2 sticks) unsalted butter, at room temperature
  • 1 C. confectioners sugar
  • 1/4 tsp. vanilla
  • 8 oz. tub of marshmallow cream

DIRECTIONS

  1. In a mixing bowl, beat the butter until creamy.
  2. Beat in 1/4 of the sugar mixture, then repeat with the remaining sugar.
  3. Beat in the vanilla, and then stir in the marshmallow cream until well blended.

Chocolate Chip Cookie Dough

This is an eggless recipe that I found over on Cupcake Project. Do you realize what this means? It’s safe to eat whenever you want, all day long. Stir it in your ice cream or just eat it out of a bowl. It’s that good.

INGREDIENTS

  • 2 C. flour
  • 1/2 tsp. salt
  • 3/4 C. unsalted butter, melted
  • 1 C. packed brown sugar
  • 1/2 C. sugar
  • 1 T. vanilla
  • 4 T. milk
  • chocolate chips, any amount you’d like

DIRECTIONS

Mix all ingredients in a bowl. I know…that was really hard. What I did at this point was use a small cookie scoop and scoop out cookie dough balls, placed them on a cookie sheet and popped them in the fridge.

Grandma Bunny’s Cheesecake

I hope this wasn’t some super secret family recipe, but this is my grandma’s recipe. Well part of it anyway since this is the crustless version. I hope you enjoy it as much as we do.

INGREDIENTS

4 eggs

1 C. sugar

1/8 tsp. salt

1-1/2 tsp. vanilla

2 C. sour cream

1-1/2 lb. cream cheese

3 T. flour

DIRECTIONS

Prepare a 9-inch springform pan. Spray it with non-stick spray and line it with wax paper or parchment paper, and then spray it again.

Beat eggs until light and foamy, gradually beat in sugar and beat until light.

Beat in salt, sour cream, cream cheese and flour.

Pour into a pan and bake for 1 hour at 350 degrees. Turn off the heat, open the oven door and let stand in the oven for another hour.

Chocolate Buttercream

Even if you don’t make this cake you NEED to make this icing. Seriously. I had to triple this recipe to have enough for the filling and icing.

INGREDIENTS

  • 1 C. unsalted butter, at room temperature
  • 3-1/2 C. confectioners sugar
  • 1/2 C. cocoa
  • 1/2 tsp. salt
  • 2 tsp. vanilla
  • 4 T. heavy cream

DIRECTIONS

Cream butter fora few minutes in a mixer with the paddle attachment on medium speed. Turn off the mixer. Sift 3 cups powdered sugar and cocoa into the mixing bowl. Turn your mixer on the lowest speed (so the dry ingredients do not blow everywhere) until the sugar and cocoa are absorbed by the butter. Increase mixer speed to medium and add vanilla extract, salt, and milk/cream and beat for 3 minutes. If your frosting needs a more stiff consistency, add a little more sugar. If your frosting needs to be thinned out, add additional milk 1 tablespoon at a time.

Graham Cracker Cake

I found this beauty on the New York Times site.

INGREDIENTS

  • 15 graham crackers (You might need more or less, but you need 2 C. crumbs.)
  • 1/2 C. butter
  • 2 eggs
  • 1/2 C. honey
  • 1-1/2 tsp. baking powder
  • 1/2 tsp. baking soda
  • 1/2 tsp. salt
  • 1/2 C. milk

DIRECTIONS

  1. Preheat oven to 350 degrees.
  2. Put the graham crackers in a brown paper bag, and smash them up. Squish and pound vigorously. Sitting on the bag insures very fine crumbs. You should end up with about 2 cups.
  3. Melt the butter in a large pan over low heat. Stir the eggs and honey in a bowl with the melted butter.
  4. In another bowl mix the graham cracker crumbs, baking powder, baking soda and salt. Pour half the graham cracker mixture into the honey mixture and stir well. Add the milk to the honey mixture, and stir again. Add the rest of the crumbs, and mix well.
  5. Grease a 9-inch springform pan or round cake pan and pour in the batter. Bake for 20 minutes or until the cake is nicely browned.
WOW! If you’ve stayed with me this long congratulations! BUT we’re not done yet…
To assemble the cake:
  • Place one layer of brownie on a cake plate or stand.
  • I tossed some cookie dough balls into the marshmallow frosting and tried to then spread this on top of the brownie. This didn’t work very well, so I took all the balls out of the marshmallow, spread the buttercream and placed the cookie dough on the marshmallow.
  • Place one layer of cheesecake on top of the marshmallow/cookie dough.
  • Next up is the chocolate buttercream followed by the graham cracker cake.
  • Now we’re just reversing everything. Spread another layer of chocolate buttercream on top of the graham cracker cake.
  • Next is the 2nd layer of cheesecake followed by another layer of marshmallow/cookie dough.
  • Top it off with the 2nd layer of brownie and frost top and sides with remaining chocolate buttercream.

When you’re done you should end up with something like this:


Keep it refrigerated until you’re ready to serve, but you’ll want to set it out at least an hour before you want to cut into it. All the butter and cheesecake and brownie goodness really firms up in the fridge. You’ll need a big knife and a strong arm to cut through this beast, but you will enjoy every. single. bite. Go ahead…you’ve earned it.


If you make this come back and let me know. I’d love to hear from you!


Week 3: Meh (or The Banana Cake that Wasn’t) January 23, 2012

Filed under: Cake,Recipes — Jen @ 3:02 am
Tags: , , , ,

Smells can trigger feelings, emotions, a state of being even.  I had such high hopes when I pulled this week’s cake out of the oven. The smell of banana bread filled the house. Mmmmmm…..it was just like being at Nana’s; warmth and comfort and all things good.
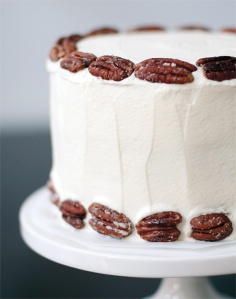
Love & Olive Oil(photo from Love & Olive Oil)

I’ve had this cake on my “Someday” List since last summer when I was researching fillings for a banana cake. I never knew there were so many options to be paired with banana: chocolate, dark chocolate fudge, caramel buttercream, cream cheese, cheesecake, cinnamon. I think I’m going to need more than 52 weeks!

Fast forward to January 2012. A friend had a baby, and I offered to take supper to her and her family. #1 I get my baby fix and #2 I can knock out a 52/52 cake. Two birds, one stone. I asked around to see what flavor cake she likes. Lo and behold, she likes banana cake. She does?! Still one stone, but now there’s three birds I can knock out of the park. Never mind the mixing of metaphors. I’m on a roll. “Someday” is here. Banana cake, here I come!

This is supposed to make a 9-inch triple layer cake. (Not sure how thick these layers are supposed to be, but I made 2 8-inch layers and had just enough batter to also make 6 cupcakes. The cake I gave to my friend. The cupcakes were for us to enjoy.)
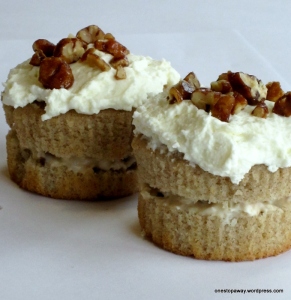
Banana Cake with Praline Filling and White Chocolate Ganache

As found on Love & Olive Oil, with a few adaptations by me. Original recipe is fromSky High: Irresistible Triple-Layer Cakes

INGREDIENTS

Cake:

  • 3 C. cake flour
  • 3½ tsp baking powder
  • 1½ tsp. cinnamon
  • ½ tsp. salt
  • ¾ C. milk
  • ½ C. ripe mashed banana
  • 8 oz. softened unsalted butter
  • 2 C. sugar
  • 7 egg whites (I used 1 C. 100% egg whites)

Praline Filling:

  • 1 C. sugared pecans
  • 1½ C. white chocolate ganache

Sugared Pecans:

Let me help you out here. I don’t have time to make my own sugared pecans. If you’d like to try, click above on the link to see the recipe. Otherwise do yourself a favor and go buy a 7 oz. package of glazed pecans. I bought mine at Aldi. You’re welcome.

White Chocolate Ganache:

  • 8 oz. white chocolate, chopped
  • 2½ C. heavy cream
  • 1½ tsp. vanilla

DIRECTIONS

For the Cake: Preheat oven to 350°. Prep your cake pans with one of the most wonderful inventions ever Baker’s Joy or Wilton’s Bake Easy non-stick spray. Line your pan with parchment paper, as well.

Sift together the flour, baking powder, cinnamon and salt and set aside. I processed the milk and banana in my blender to make a smooth, light puree. Set aside.

In my large mixer bowl I creamed together the butter and sugar until light and fluffy. On medium high speed, beat in egg whites 2-3 at a time until smooth. Scrape down the sides of the bowl between egg additions.

With the mixer on low speed add the dry ingredients and banana puree alternately in 2-3 additions, beating until just blended. Scrape down the sides of the bowl and beat on medium-high speed for 1 minute. Divide the batter among your prepped cake pans.

Bake for 20-25 minutes or until a cake tester comes out clean when inserted into the center of each cake. (My cupcakes were done in 20 minutes. The cakes took 30.) Let the cake layers cool in the pan for 10 minutes and then turn out onto a wired rack and remove the parchment. Cool completely for about an hour.

For the Praline Filling: With a large knife chop the pecans and add to the white chocolate ganache. Stir to mix well.

For the White Chocolate Ganache: Put the white chocolate in a medium heat proof bowl. Bring ½ cup of the cream to boil in a small sauce pan. Pour the hot cream over the chocolate and let sit 1 minute. Whisk until smooth. Let the white chocolate cream stand until cooled to room temperature.

In a chilled bowl with chilled beaters, beat the remaining 2 C. heavy cream and vanilla until softly whipped. Stir in the white chocolate cream and beat until fairly stiff. This is very important: DO NOT OVERBEAT. This should only take a minute or two. You can tell when you’ve gone too far because your ganache is a curdled mess. Go ahead and ask me how I know.

To assemble the cake: put one layer, flat side up on a cake stand or serving plate. Cover the top evenly with praline filling, leaving ¼-inch margin around the edges. Place the second layer on top, again flat side up. Frost the sides and top with the white chocolate ganache. Garnish with sugared pecans.
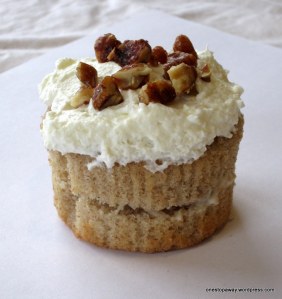
Like I said, I had really high hopes for this cake. It smelled wonderful coming out of the oven. Sugared pecans, white chocolate ganache…what could possibly go wrong with this?! Well….as a whole it was really good. But once you start looking at the individual parts that’s where I started to lose interest. The cake itself was tasty, BUT it didn’t taste like banana. It was just a very subtle spice cake. The white chocolate ganache and praline filling – couldn’t really taste the white chocolate, just a nicely sweetened whipped frosting.

My husband assured me it was delicious, and it was but NOT if you’re looking for banana cake with white chocolate ganache.
Enjoy!

 

Week 2: Divine January 17, 2012

DIVINE. Relating to God, gods or goddesses: connected with, coming from or caused by God or a god or a goddess.

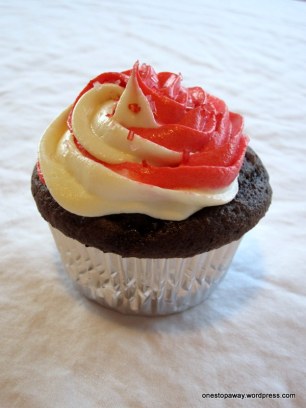
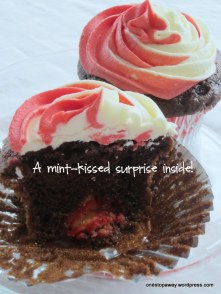
So when one of my BFF’s chose this word to describe these cupcakes I was more than a little flattered. I mean…I’ve never been called a goddess before! (Well, at least not by anyone other than the voices in my head.) What we have here are Hot Chocolate Cupcakes with Candy Cane Kisses and White Chocolate Peppermint Buttercream. I found inspiration for these cupcakes over at Half Baked. I wanted to include peppermint in a way that did not include making my own peppermint bark (good lord, who has the time for that?) and ended up over at Picky Palate where she used Hershey’s Mint Truffle kisses to add a sweet surprise inside. Then I found a great White Chocolate Peppermint Buttercream over at Becky’s Cakes.

Hot Chocolate Cupcakes The base for these is, again, this recipe from Cake Central. Feel free to use the chocolate cake recipe of your choice. Just make sure to sub prepared hot chocolate for the listed liquid. Ingredients

  • 1 box Betty Crocker Chocolate Fudge cake mix
  • 1 package instant chocolate pudding
  • 1 C. sour cream
  • 3/4 C. prepared hot cocoa (specifically I used one .71 oz. packet Nestle Rich Chocolate mixed with 3/4 C. warm milk)
  • 1/2 C. canola oil
  • 4 large eggs
  • 24 Hershey’s Candy Cane kisses

Directions

  1. Preheat oven to 350. Place cake mix, pudding, sour cream, prepared hot cocoa, oil and eggs in a bowl and mix on medium speed until well combined. Fill cupcake liners about 3/4 full, and then place one candy cane kiss into the center of each cupcake pressing to the bottom. Bake approximately 20-25 minutes. Yield 24 cupcakes

Becky’s buttercream turned out wonderfully. I believe I ended up using 2 tsp. peppermint extract, as well as just a bit more than the 3-4 Tbs. heavy cream asked for. All butter buttercream has always been a favorite of mine. “Everything’ better with butter!” If you’ve not tried all butter buttercream then you’re in for a treat. It’s not as sweet or “heavy” as shortening based buttercream, but it’s also more delicate. The heat of your hands when working with it can soften it enough that you have to put it in the fridge to let it set a bit before using again.

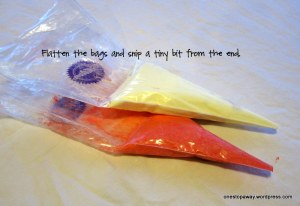
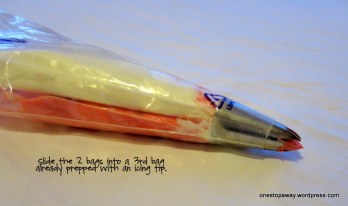
I tried a couple different decorating techniques with these before ending up with the 2-tone swirl above. Becky had striped her icing bag with red food coloring and then piped it on. I tried that, but yeah….didn’t like that.  I tried putting 2 colors of icing (white & red) in one icing bag and piped, but hmmm….still not quite there yet. I ended up sticking with the easiest way I know to do 2-tone icing.


These were first intended as after school snacks for The Middle Child’s Daisy troop; however due to a snow day that was cancelled. Then I thought, “Perfect! New Year’s teacher gifts!” You know…because I was too lazybusy to get it done in time for Christmas. BUT I just couldn’t resist slicing into one of these to show you.

Enjoy!


Week 1: Voluptuous January 10, 2012

Filed under: Cake,Recipes — Jen @ 3:40 pm
Tags: , , ,

Well…the challenge got off to a slow start. I’ve pretty much been sick for the last three weeks, so finishing this cake has been quite the accomplishment. The last several days have been (try to) sleep, cough, drink some coffee, cough, throw in a load of laundry, cough, drink some coffee, cough annnnnd cough some more. In between all that the monsters needed attention, if you can believe that. I guess in Indiana it’s frowned upon when you don’t feed your kids. Go figure. So the cake came together in pieces. One day I baked the cakes, another day I made the buttercream, a third day I made the filling and then put it all together. Low and slow.

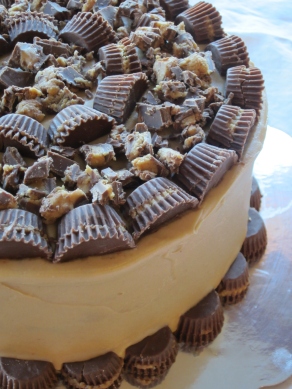
As I mentioned in my previous post I’ve wanted to combine peanut butter and chocolate for months now, and boy did I ever accomplish it with this cake. I initially found this idea on (gasp!) Pinterest, which led me to Flikr. How to describe this cake? When asked, my husband said voluptuous. I would borrow a much loved phrase from my son: Sweet mamma potato! Dark chocolate cake with a peanut butter ganache filling and iced with a peanut butter buttercream. Ultra rich and ultra decadent, this cake is definitely not for the faint of heart.
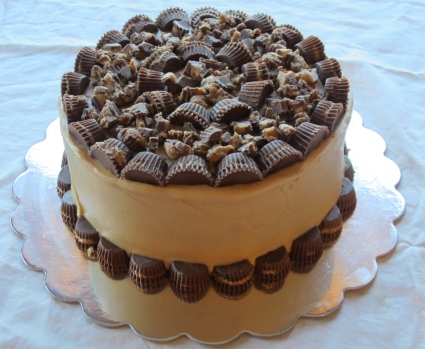
I used my tried and true chocolate cake recipe, which is originally from The Cake Mix Doctor, but I found posted on Cake Central. I used Pam’s filling recipe, and the peanut buttercream is one I found on My Cake School. I’m not including the buttercream recipe here since this is a paid site, but you shouldn’t have any problem finding one. As long as it has some variation of PB, butter, powdered sugar and vanilla then you’re good to go.

Dark Chocolate Cake

Adapted from Cake Central

  • 1 box Betty Crocker Dark Chocolate cake mix
  • 1 (3.9 oz) box instant chocolate pudding
  • 1 C. sour cream
  • ½ C. Hershey’s Special Dark chocolate syrup
  • ½ C. canola oil
  • 4 large eggs

Preheat oven to 325°. Prepare your cake pans. (For this cake I made 2 8-inch layers. Any more than this and you should probably double the recipe. This recipe can yield 1 10-inch cake, 1 9×13 or approximately 31 cupcakes.) Combine all ingredients and blend on low for about 30 seconds to 1 minute. Stop and scrape down the sides. Increase the mixer to medium and beat 1½ to 2 minutes. The batter will be thick and should be well combined. Pour batter into pans, place on middle oven rack and bake until the cake springs back when lightly touched. The original recipe says this should take 28 to 35 minutes, but for me it’s been consistently 40 minutes. Meh…different ovens and all that jazz.

Peanut Butter Fudge Filling

  • 8 oz. Nestle dark chocolate morsels (Pam’s recipe calls for semi-sweet chocolate, but I didn’t have any. The dark chocolate was OK, but if I were to make this again I would go with SS.)
  • 8 oz. heavy cream
  • ½ C. creamy peanut butter
  • ½ C. Reese’s peanut butter cups, roughly chopped

Put the chocolate in a medium bowl. In a small sauce pan heat the cream until it just begins to boil. Pour it over the chocolate and whisk until the chocolate melts. Whisk in the peanut butter until it’s well combined and smooth. This makes 2½ cups of filling. Set aside ¼ of the mixture (Don’t ask me how long it took to do the math, but that’s equal to 5/8 C.) Once the rest of the chocolate mixture is cooled completely gently stir in the chopped peanut butter cups.

To Assemble:

Place one cake layer on a cake stand or plate. I piped a PB buttercream dam, but I’m not entirely sure it was necessary. Fill in with the PB fudge filling. (The filling recipe made much more than was actually needed. I don’t think I even used half of what I had.) Place your second cake layer on top. Using the reserved filling (remember that 5/8 cup? Yup…that’s the one.) spread a thin layer on the outside of the cake, a sort of ganache crumb coat. Refrigerate until the ganache is set and firm to the touch. Once this has set, ice the cake with the PB buttercream of your choice and decorate with any extra peanut butter cups.

I would keep this refrigerated BUT you’ll need to let it set out before serving to give the ganache time to soften otherwise you’ll have a chocolate PB mess on your plate. This is VERY rich, so a small slice will do ya.

My word, I need a glass of milk just looking at it. Enjoy!